Running Pi-hole on AWS EC2
Easy. Low Latency. Cheap.
Well, since my last post explained my reasoning behind my decision to move my DNS resolver (pi-hole in this situation) to AWS EC2, I figured it was time for a tutorial.
Some basics first. I am currently running two instances of pihole for redundancy. That of course doubles your cost. But, honestly, AWS EC2 is so cheap to begin with that its should not be a problem. As I mentioned in my previous post, running two AWS EC2 t2.micro instances 24/7 for a month comes out to a little over $13.00. If you are new to AWS however, YOU GET 750 HOURS EACH MONTH FOR 12 MONTHS OF T2.MICRO COMPUTING FOR FREE.
That is a pretty damn good deal. Unfortunately, I have been using my AWS account for over a year and no longer qualify for the free tier. The free tier has tons of other added benefits that I may go over at a different time. Now that we have cost out of the way, let’s get to installing pi-hole.
Sign up for an AWS account - Pretty obvious one here. Navigate to https://aws.amazon.com/resources/create-account and create an account.
Navigate to your EC2 Dashboard.
You should see a screen similar to this. This is a general overview of your EC2 dashboard. Here you can start new instances, see your running resources, and get a broad overview of what is going on in your account. Make sure to set the region (top right) to the area that is closest to you. As you can see I am in the Virginia and thus I chose “US East (N. Virginia)us-east-1” as my region. Choosing a wrong region can increase latency for your pi-hole.
Let’s first upload our public key. In order to access your instance, you need to have a public key uploaded to AWS or you can create one during the instance creation process. I have a key that I like to use and thus I want to upload it to AWS so I can keep using it.
On your EC2 dashboard, click on the “Key Pairs” box.
Click “Actions” and choose “Import key pair”
Go ahead and give your keypair a name. Grab your public key (usually id_rsa.pub) and either upload the file or paste it into the box and click “Import key pair”
And that’s it for that step.
Next we will create the instance. Navigate back to your EC2 Dashboard.
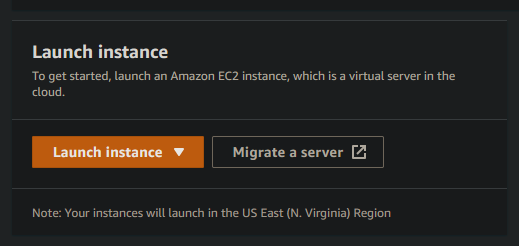
Click “Launch Instance” → “Launch Instance”
We will be using Ubuntu 20.04 as our OS for this tutorial.
Search for “ubuntu” in the search bar and select the version you wish to use.
Choose the t2.micro instance shape (pi-hole won’t run that well on t2.nano but give it a shot if you want) and click “Next: Configure Instance Details.”
If you wish, you can create 2 instances by changing the number in the first highlighted box. Make sure that “Auto-assign Public IP” is set to “Enable”. After everything looks good, click “Next: Add Storage”.
You really only need 8GB of storage (plus it keeps the cost down to use less). Click “Next: Add Tags”.
Add a name tag. Click “Next: Configure Security Group”.
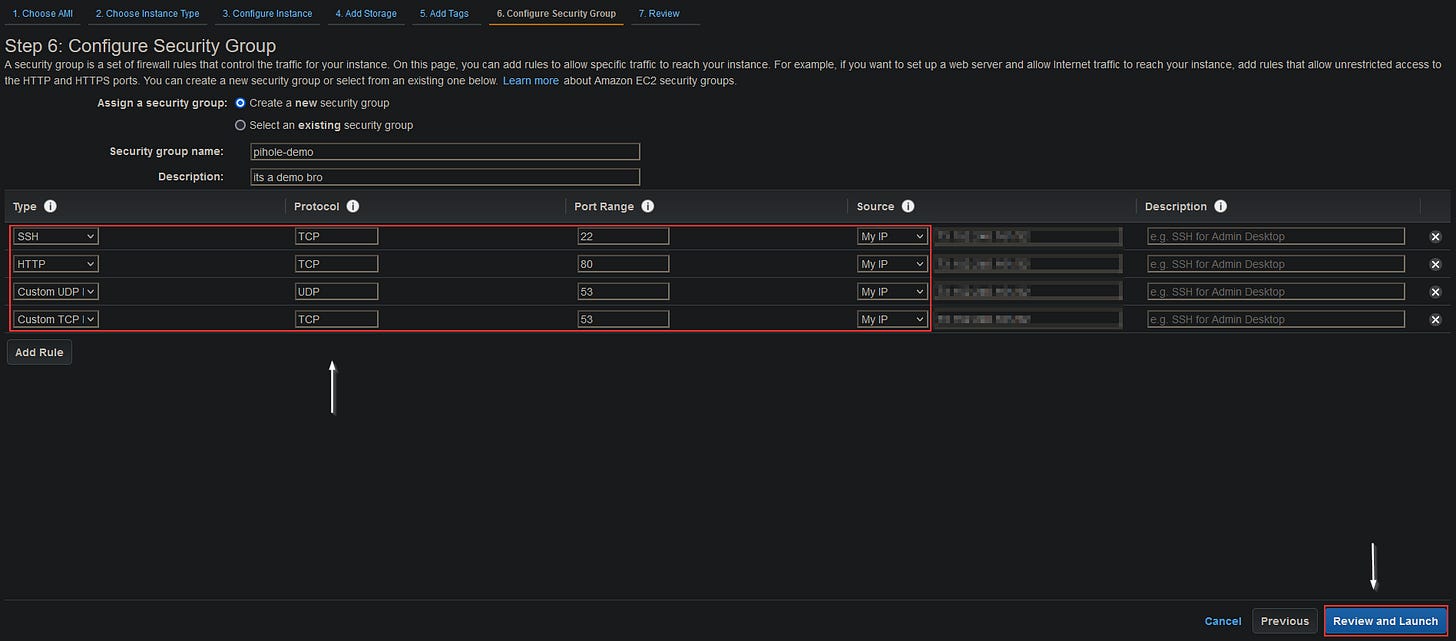
Create a security group with the following rules. Make sure to choose “My IP” unless you want to access the pi-hole outside of your home network (UPDATE: READ MORE ABOUT OPEN RESOLVERS HERE). Only include port 80 if you intend to access the web gui (some of y’all wildin’ with no pi-hole gui). Name your new security group and click “Review and Launch”.
Look over everything and/or just click “Launch”.
Next we need to add the key pair that we uploaded in the first step. Check the box that says “I acknowledge that I have access…” and click “Launch Instances”.
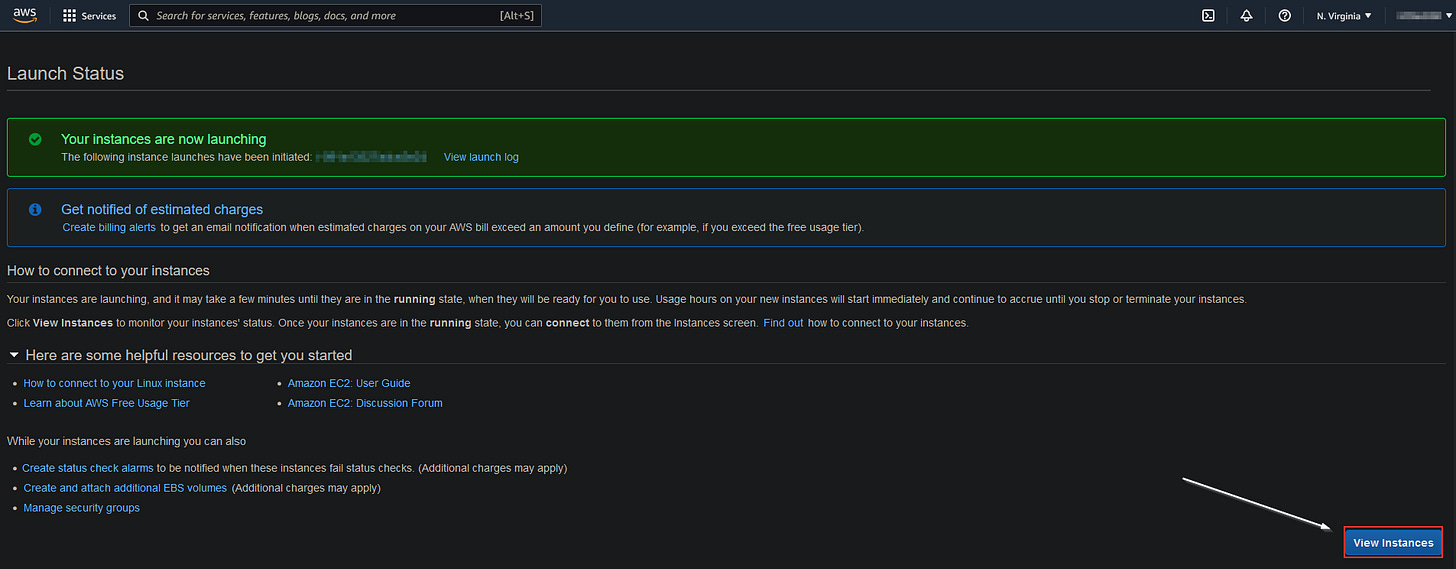
Finally, click “View Instance”.
Let’s SSH into our new instance!
You should see your new instance running. As you can see the instance now has a public IP and the status check is “Initializing”. Let’s SSH into this new instance.
Make sure you log in as “ubuntu” since this is the default user. Now that we are able to access our server, set up as usual can no begin.
Update and Upgrade:
sudo apt update && sudo apt upgrade -yInstall Pi-Hole:
curl -sSL https://install.pi-hole.net | bashPoint your DNS at the public IP and boom. We are done.
And it really is that easy. You can totally sync your two piholes by using Gravity Sync which is an amazing tool created by Michael Stanclift. You can also use cloudflared (DoH) and personally, I highly recommend this.
Thats all for today,
Joe


