Running Pi-hole on Oracle Cloud FOR FREE
Turns out there is such a thing as free lunch!
Tutorial alert: If you don’t like tutorials, you won’t like this.
Running pi-hole in the cloud is considered controversial for some reason. As I discussed earlier, the pi-hole community on reddit is ruled with an iron fist and the mods seem to be quite condescending. I don’t want to reopen healed battle scars so if you want to read my post about the pi-hole mods on reddit, by all means, enjoy.
Going back to my original statement it should not be controversial to run pi-hole in the cloud. As long as you have the proper security and filtering set up, you will be golden.
I chose Oracle Cloud over AWS recently because I stumbled across an amazing promotion(?) that allows cloud users up to “the first 3,000 OCPU hours and 18,000 GB hours per month or the equivalent to 4 OCPUs and 24 GB of memory” of the VM.Standard.A1.Flex compute shape. Why is it free?
Oracle has partnered with Ampere Computing, Arm, GitLab, Jenkins, and others to accelerate the Arm developer ecosystem. Arm processors have grown from mobile devices to servers in the cloud, and we provide the tools and platform for developers to transition, build, and run Arm-based workloads.
Ah, so this is that new ARM based CPUs I have been hearing about for the last 5 years. In all honesty, “tHe wOrLd iS sWiTcHiNg tO aRm” argument is about as old as the “iPv6 wIlL bE tHe NeW sTaNdArD” argument.
But hey, FREE ARM INSTANCES? I AM HERE FOR IT!
After testing for a little over a month I will say, the ARM procs seem to be snappier, more efficient, and just damn good! Since pi-hole is not a high intensity program, take my words with a grain of salt. I haven’t tried highly intensive programs on these new procs. That being said, let’s jump in!
First off, you need to have an Oracle account. Go here and sign up.
You will get some free tier stuff that is handy if you are going to be trying out Oracle Cloud more in depth. I won’t be going into that here.
Once you are all signed up, sign into your tenancy and navigate to the “Get Started” page. You should see something like this:
As you can see, I am using the US East region. Feel free to pick one closer to you.
From the “Get Started” page, click on the hamburger menu located in the top left corner. Click “Compute” and now click “Instances”
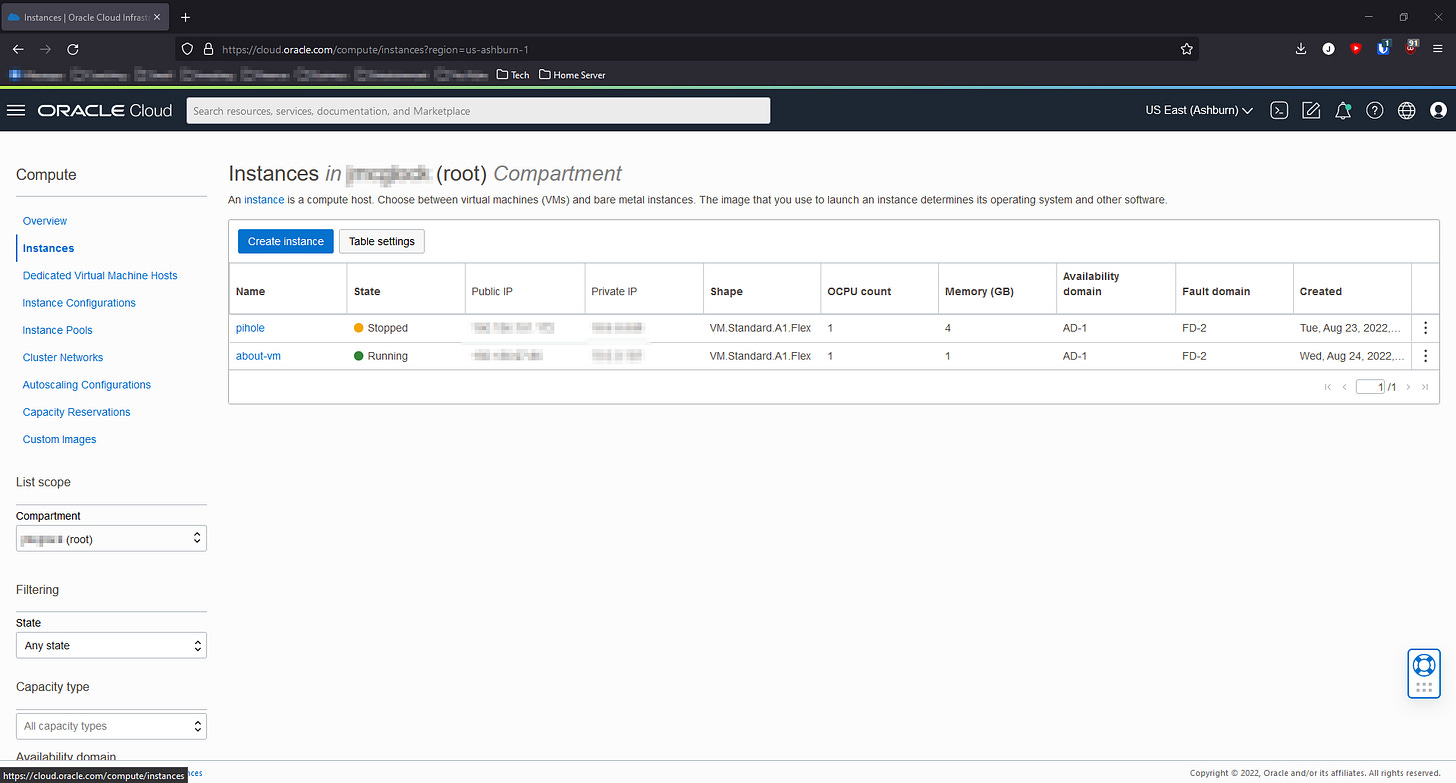
Now we can see all of our running instances.
As you can see I have two instances currently running. One is an old pi-hole instance I have stopped currently and the other is the server I use for hosting my about jmcglock website. Pretty simple stuff. Notice both are using that A1 Flex shape. Let’s actually create an instance now.
Click on the “Create Instance” button.
We will want to change a few things first.
First and foremost, rename your instance to something recognizable.
Next, you should change the OS or image to something you know. I personally choose Ubuntu 20.04 (pi-hole doesn’t currently support 22.04 SMH) but you can choose any image you want to use.
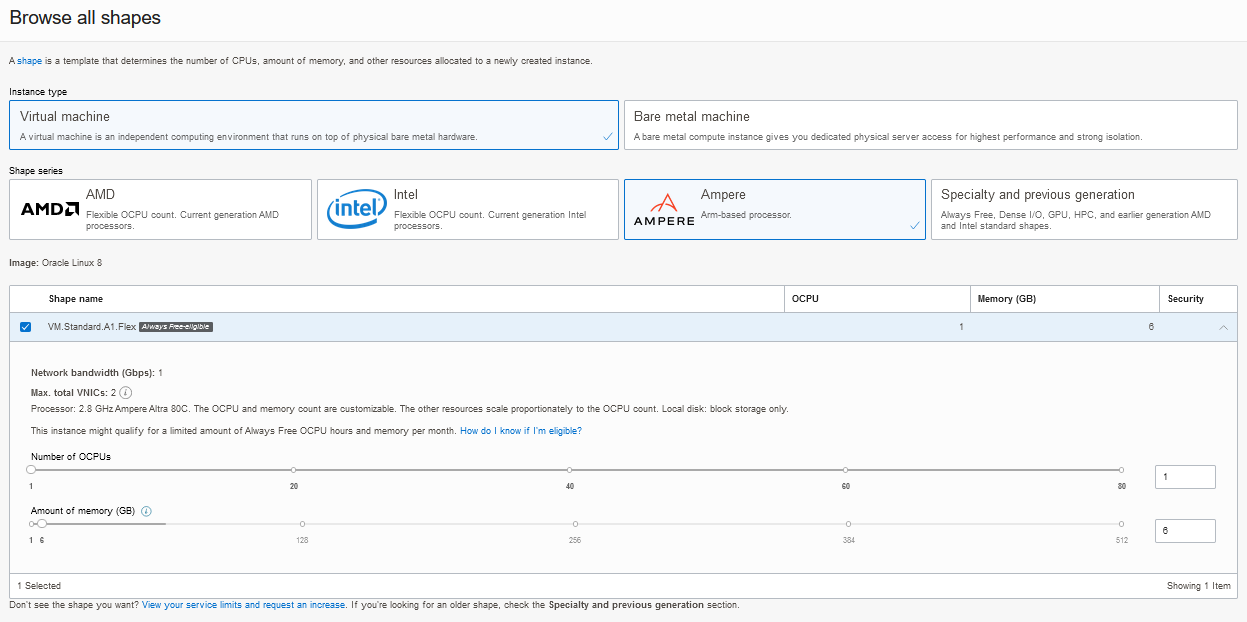
Next, we need to change the shape. Hit the “Change Shape” button and use the following:
Notice we chose the “Ampere” series and that allows us to choose the A1 Flex shape. I would recommend using 1 CPU and 2-4 GB of RAM. Anything more than that is overkill.
Now that we have the correct OS and shape, let’s shift to networking. Choose the following:
Create a new VCN and name it. Make sure to put it in the same compartment as the instance.
Create a new subnet and name it.
Make sure to check “Assign a Public IPV4 Address”.
And last, paste your public key into the SSH Keys box.
Next, click “Create”.
Boom, we have our ARM instance.
Before we SSH in, we need to change some stuff with our subnet. Click on the link to your subnet:
Click the link shown below:
Next we will need to add some ingress rules. These rules allow certain traffic from certain locations. Since we don’t want to create an open resolver, we need to narrow down where traffic is allowed to flow. Create the following ingress rules:
Let’s break it down. Every port we open in the VCN (virtual cloud network) will only allow traffic originating from our home public IP. You can find your public IP here: whatismypublicip.com
Port 22 is used for SSH
Port 53 UDP and 53 TCP are used for DNS
Port 80 UDP and 80 TCP are used for the pi=hole dashboard
If someone tries to SSH into your server, they won’t be able to unless they are on your home network.
Now that we have hardened our VCN, let’s get pihole installed on our ARM instance.
SSH into your instance. I use a program called Termius for managing my servers over SSH. It is amazing and you should use it. Download it here. A lot of people use Putty. I used Putty while at my job for years. It doesn’t look nice. Call me petty.
Once you are SSHed into your instance, run the following:
sudo apt update && sudo apt upgrade -y
This will check for updates and install them.
Next, install fail2ban (an extra layer of security)
sudo apt install fail2ban -y
Next, send a reboot
sudo reboot
Wait for the instance to come back up.
SSH back into the instance when it comes back up after the reboot and let’s get ready to install pi-hole. There is one more step that we must do before running the pi-hole install script. You won’t be able to use pi-hole if you neglect this step.
Let’s edit some iptables:
sudo nano /etc/iptables/rules.v4
You will need to add the following lines (noted in bold and italics):
-A INPUT -m state --state RELATED,ESTABLISHED -j ACCEPT
-A INPUT -p icmp -j ACCEPT
-A INPUT -i lo -j ACCEPT
-A INPUT -p udp -m udp --sport 123 -j ACCEPT
-A INPUT -p tcp --dport 53 -j ACCEPT
-A INPUT -p udp --dport 53 -j ACCEPT
-A INPUT -p tcp -m state --state NEW -m tcp --dport 22 -j ACCEPT
-A INPUT -p tcp -m state --state NEW -m tcp --dport 80 -j ACCEPT
-A INPUT -j REJECT --reject-with icmp-host-prohibited
-A FORWARD -j REJECT --reject-with icmp-host-prohibited
-A OUTPUT -d 169.254.0.0/16 -j InstanceServices
(CTRL+X) + (CTRL+Y) saves the changes made.
Now send another reboot
sudo reboot
SSH back into the instance when it comes back up after the reboot. Finally, run the following:
curl -sSL https://install.pi-hole.net | bash
This wizard will walk you through the pi-hole install.
Congratulations, you now have pi-hole running for free on OCI!
Hopefully you enjoyed this tutorial. I have more on the way and plan on releasing more paid tier content. Make sure you subscribe.
Cheers,
Joe


