

From Code to Cloud
Let's code a Simple HTML Website, containerize it with GitHub Actions, deploy it to a Kubernetes cluster, and expose it using Traefik.

As a “cloud engineer/architect”, I leverage my broad scripting skills on a daily basis, though I don't consider myself a full-stack developer. In an effort to expand my capabilities, I have been meaning to write this article for some time and use it as a fun little project to learn new things.
The goal is to walk through building and deploying a basic HTML website using tools like GitHub Actions, Kubernetes, and Traefik (my bread and butter). As someone who writes Python, Bash, Powershell, and HCL almost every day for infrastructure automation, I look forward to stepping out of my comfort zone into the age old world of HTML and CSS.
With that disclaimer out of the way, what am I actually going to be doing today in this tutorial?
First, we will be coding a simple HTML website.
Second, we will be “Dockerizing” this website using GitHub Actions.
Third, we will create Kubernetes manifests and we will deploy this website to my home Kubernetes cluster.
Finally, we will use Traefik to expose the website to the world.
Let’s get started!
I own a few domains. For this demo, we will be deploying our website to demo.jmcglock.com.
Let’s code a simple website in HTML. I have created a public repo containing the files for this demo project. You can take a look at the repo here.
First we need a basic HTML file:
<!DOCTYPE html>
<html>
<head>
<title>My Demo Site</title>
<link rel="stylesheet" type="text/css" href="/css/styles.css">
</head>
<body>

<div class="main">
  <h1>Hello Friend! You have arrived at my demo site!</h1>
  <p>Welcome!</p>
</div>

</body>
</html>
Now we need a CCS styling file:
.main {
    text-align: center;
    background-color: #f2f2f2;
    padding: 50px;
  }

  h1 {
    font-size: 36px;
    color: #0077be;
  }

  p {
    font-size: 24px;
    color: #009d57;
  }
Awesome. We have the easy part done.
Next, we will be “Dockerizing” this website using GitHub Actions.
For the uninitiated, GitHub Actions is a CI/CD pipeline tool that you can use for automating software workflow processes directly in your GitHub repositories. It allows you to build out custom workflows that can do things like:
Run tests every time new code is pushed
Automatically build and package software
Deploy to staging/production environments
Trigger other actions like notifications
The key benefit is that GitHub Actions is deeply integrated with GitHub, so you can hook into GitHub events like code pushes, pull requests, etc and trigger workflows. This makes it easy to automate your software projects without having to set up external CI/CD servers.
And since it leverages Docker containers and runs on GitHub's infrastructure, you get a very scalable solution without having to manage your own runners. You can deploy to any platform like Kubernetes, cloud providers, etc.
Cool, before we containerize the website, we need to decide where we want our container image to land once we build it. I will be using plain ole’ Dockerhub. I create a Dockerhub repository.
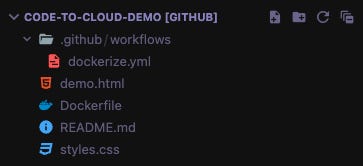
Here is the file and directory structure we need in order to set up GitHub actions:
.github/workflows/
    |
    |— dockerize.yml
Here is the contents of the dockerize.yml file:
name: Build and Publish Docker Image

on:
  push:
    branches:
      - main

jobs:
  build:
    runs-on: ubuntu-latest
    steps:
      - uses: actions/checkout@v2
      - name: Build Docker Image
        run: |
          docker build --platform linux/amd64 -t <YOUR DOCKERHUB USERNAME>/<YOUR DOCKERHUB REPOSITORY>:latest .
      - name: Publish Docker Image
        env:
          DOCKER_USERNAME: ${{ secrets.DOCKER_USERNAME }}
          DOCKER_PASSWORD: ${{ secrets.DOCKER_PASSWORD }}
        run: |
          docker login -u "$DOCKER_USERNAME" -p "$DOCKER_PASSWORD"
          docker tag <YOUR DOCKERHUB USERNAME>/<YOUR DOCKERHUB REPOSITORY>:latest <YOUR DOCKERHUB USERNAME>/<YOUR DOCKERHUB REPOSITORY>:$(date +%Y%m%d.%H%M)
          docker push <YOUR DOCKERHUB USERNAME>/<YOUR DOCKERHUB REPOSITORY>:latest
          docker push <YOUR DOCKERHUB USERNAME>/<YOUR DOCKERHUB REPOSITORY>:$(date +%Y%m%d.%H%M)
This GitHub Actions workflow automates building and publishing a Docker image when code is pushed to the main branch.
Here is what it is doing:
Uses the
actions/checkout@v2action to checkout the codeBuilds a Docker image using the Dockerfile in the repo and tags it as <YOUR DOCKERHUB USERNAME>/<YOUR DOCKERHUB REPOSITORY>:latest
Logs into Docker Hub using credentials stored as GitHub secrets
Tags the built image with the current date/time as well for versioning
Pushes the Docker image with the
latestAND current date/time tag to Docker Hub
So on every code push to main, this will:
Build a Docker image
Publish it to Docker Hub
With
latestand dated tags for versioning
Amazing. Make sure to fill in the correct variable with your own information.
Next, we need a Dockerfile:
FROM nginx:stable-alpine

# Copy the static content to the container
COPY styles.css /usr/share/nginx/html/css/styles.css
COPY demo.html /usr/share/nginx/html/index.html

# Run Nginx as non-root user
RUN touch /var/run/nginx.pid && \
    chown -R nginx:nginx /var/run/nginx.pid && \
    chown -R nginx:nginx /var/cache/nginx && \
    chown -R nginx:nginx /usr/share/nginx/html

USER nginx
Here's a breakdown of what it's doing:
Uses the nginx:stable-alpine image as the base - this gives us a fast and lightweight Nginx server
Copies over the 2 static files (styles.css and demo.html) into Nginx's web root directory (/usr/share/nginx/html)
Sets up the proper permissions and ownership so that Nginx can access the files when running as a non-root user
Switches the runtime user to the nginx user instead of root for improved security
When you are done adding these files, you should see the following in your IDE:
As a side note, I use VS Code, the best code editor.
We now need to make the Docker username and password secrets in GitHub since we referenced these in our YML.
In the repo, we navigate to “Settings” → “Secrets and Variables” → “Actions Secrets”.
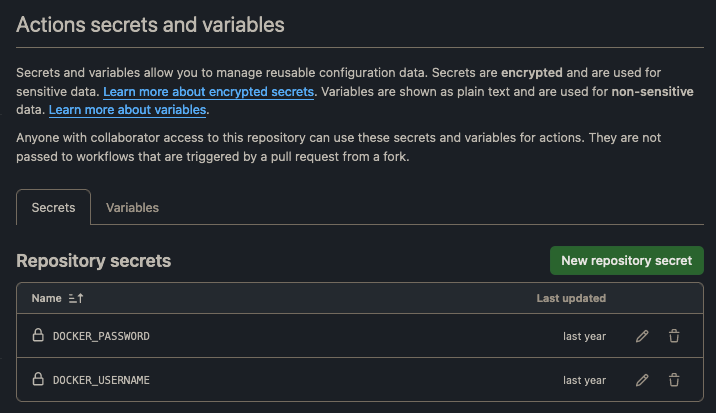
You will need to create these two secrets.
After we create the secrets, our GitHub actions should have triggered a new build.
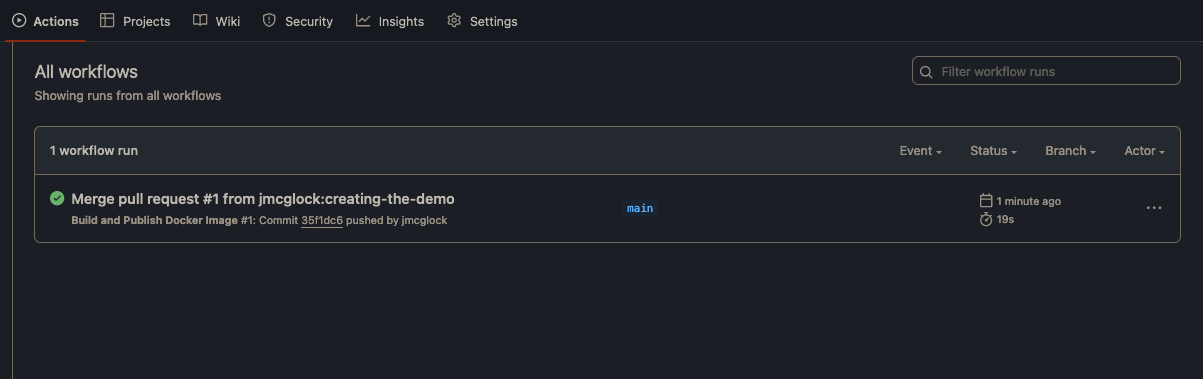
Very cool! We now have a docker image that we can pull down into our Kubernetes cluster.
Let’s write a Kubernetes manifest:
apiVersion: apps/v1
kind: Deployment
metadata:
  name: from-code-to-cloud
  namespace: from-code-to-cloud
  labels:
    app: from-code-to-cloud
spec:
  replicas: 1
  selector:
    matchLabels:
      app: from-code-to-cloud
  strategy:
    type: RollingUpdate
    rollingUpdate:
      maxSurge: 1
      maxUnavailable: 1
  template:
    metadata:
      name: from-code-to-cloud
      labels:
        app: from-code-to-cloud
    spec:
      containers:
      - name: from-code-to-cloud
        image: <YOUR DOCKERHUB USERNAME>/<YOUR DOCKERHUB REPOSITORY>:latest
        imagePullPolicy: Always
        ports:
        - containerPort: 80
---
apiVersion: traefik.containo.us/v1alpha1
kind: IngressRoute
metadata:
  name: from-code-to-cloud-ingressroute
  namespace: from-code-to-cloud
spec:
  entryPoints:
    - web
  routes:
    - match: Host(`demo.jmcglock.com`)
      kind: Rule
      services:
        - name: from-code-to-cloud-svc
          port: 80
---
apiVersion: v1
kind: Namespace
metadata:
  name: from-code-to-cloud
---
apiVersion: v1
kind: Service
metadata:
  name: from-code-to-cloud-svc
  namespace: from-code-to-cloud
spec:
  selector:
    app: from-code-to-cloud
  ports:
  - name: from-code-to-cloud
    port: 80
    protocol: TCP
    targetPort: 80
Here's a breakdown of what we created:
A Deployment that creates a ReplicaSet to deploy and run your docker image. It has:
app=from-code-to-cloud labels
Runs 1 replica pod
Uses RollingUpdate strategy
Configures the pod spec with your docker image
A Namespace resource to logically isolate and group all the application resources.
A Service that exposes the application pods to other services in the cluster on port 80.
An IngressRoute that configures Traefik to route traffic from the demo.jmcglock.com hostname to the application service over port 80.
I have configured my home Kubernetes cluster to use Argo CD. I won’t be going into this in detail today.
Also, we are using the “latest” tag in our deployment. This is not recommended. You can always use the other date tag that we created when we dockerized this website.
In an earlier blog post, I talked in depth about how I have Traefik set up in my homelab.
I won’t be going too much into detail, but the long and short is:
Traefik is installed
Traefik use MetalLB as a loadbalancer
The load-balancer port is forwarded at the network level
I have a DNS entry in Cloudflare for my home IP.
Access is only allowed to the pod through Cloudflare.
Let’s navigate to the site.
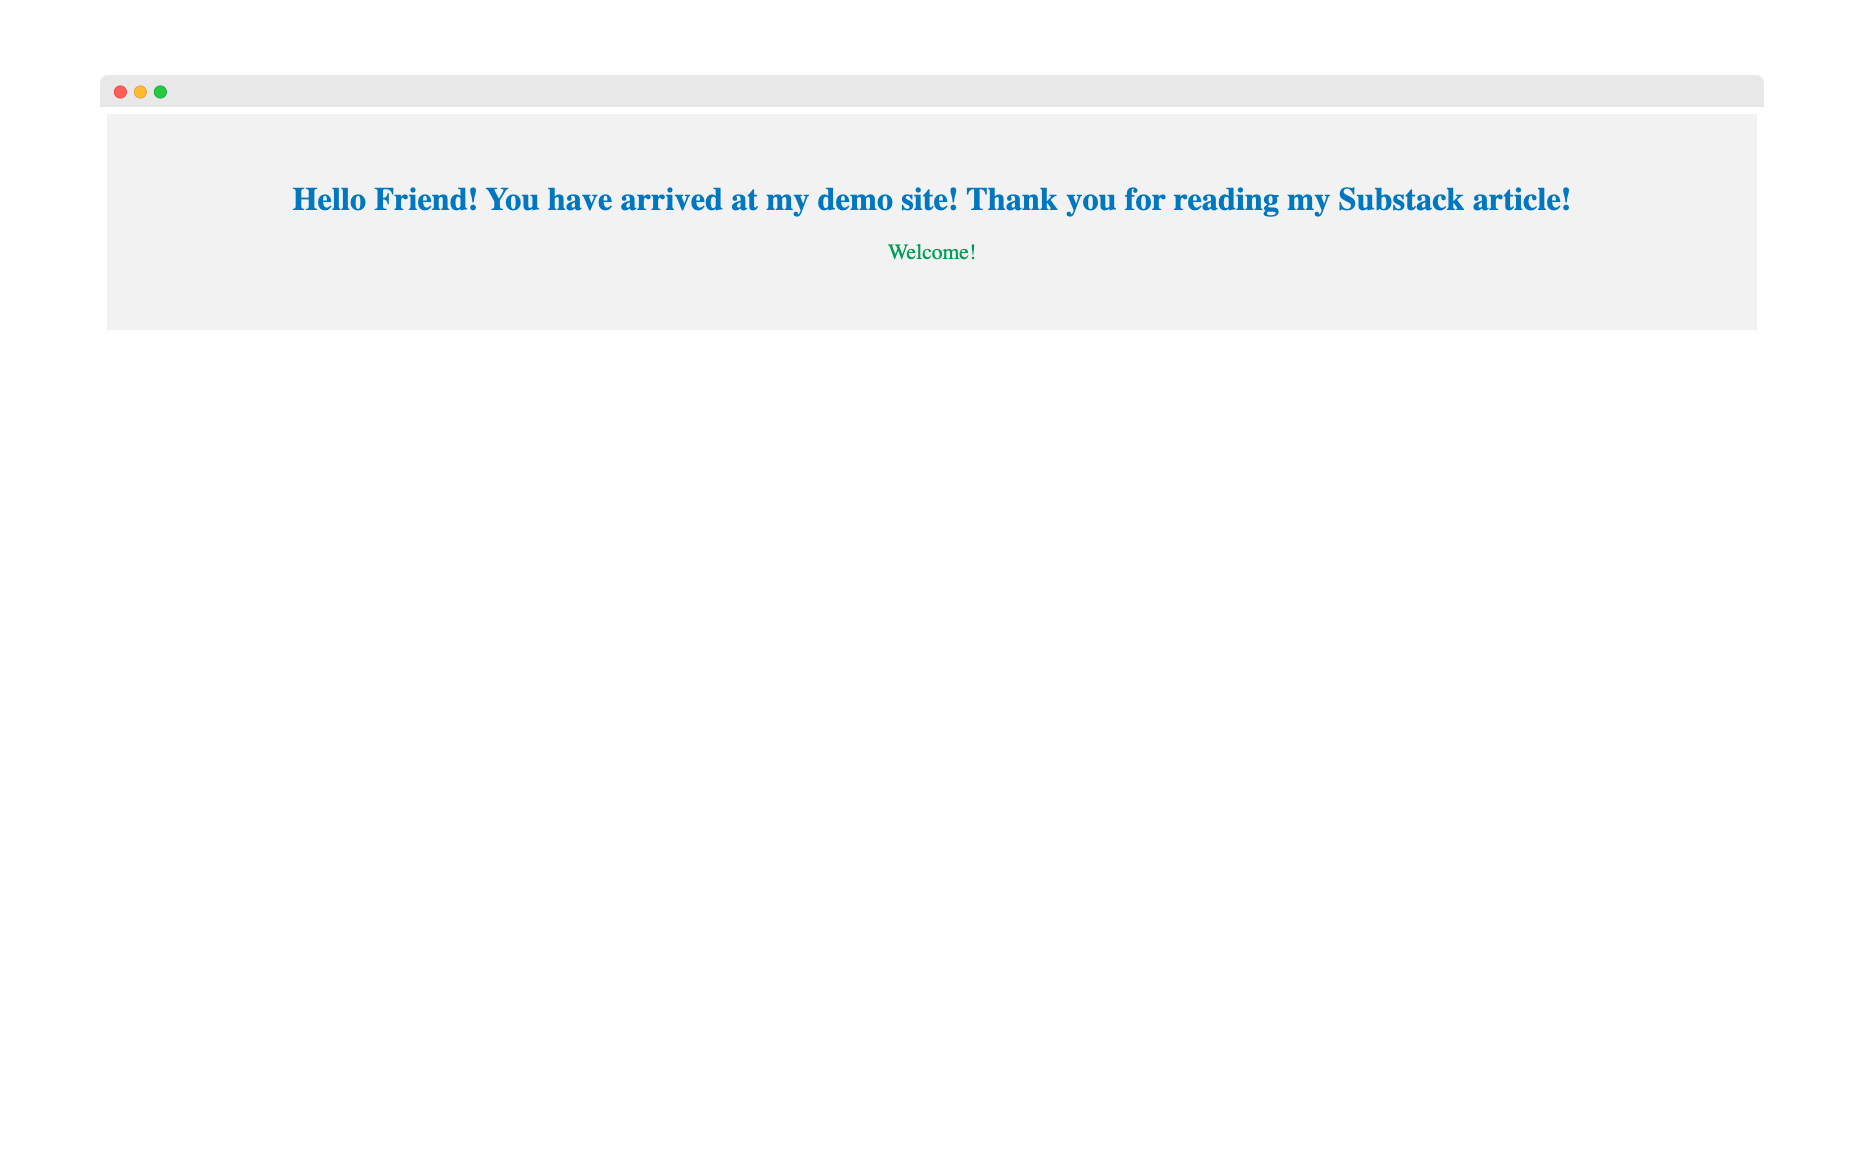
And there we go! It looks straight out of the early 2000s web. Notice I tweaked the wording a bit here.
And that’s really it. We went through the basics of building and deploying a basic HTML website using tools like GitHub Actions, Kubernetes, and Traefik.
I hope you found this helpful.
Cheers,
Joe